How to upload images to Cricut Design Space
 One of the amazing features of a Cricut machine is the ability to upload your own images to Design Space and having them cut on your machine. In this post, we will walk through how to upload images to Cricut Design Space and talk about why this feature is simply amazing.
So how do you upload images to Cricut Design space ? Do you think it’s easy or difficult? I’ll cut right to the chase and tell you that it’s super easy. You can upload an image in a few simple steps so if that’s your only question, there it is. But if you want to dive a little deeper into how easy it really is then stick around. This pictorial will clearly outline the steps for you.
Why should you care to upload an image to Cricut Design Space
We know that Cricut Design Space has thousands of amazing images available for us to use in our projects. However, what is the solution to those moments you may want to work with an image that is not in Design Space. This is where uploading an image comes in handy!
You can create your own, grab a free file from a blog or purchase one. Whichever route you take, what’s important is the fact that you can work with your own images in Design Space. How awesome is that?!! You can really bring your projects to a whole new level especially when you are working with animated characters or a theme!
We’ve all see the bomb Starbucks cups with awesome animated characters on Instagram or the centrepieces and birthday banners with really cool characters, right? Well it’s the upload feature that allows these women to create these amazing projects!
So what types of images can you upload?
You can upload Vector images or Simple images. I am not techy so this is a very basic definition of these terms. If you are more curious, please feel free to do your own research.
Basic images are JPG, BMP, PNG, and GIF files. These are a single layer files that lose their image quality if you scale them too much.
Vectors are SVG and DXF files. These can be more than one layer. Vectors will never lose their image quality no matter how big you scale them. In this tutorial we will be looking at how to upload an SVG Image.
How to upload an image to Cricut Design Space
If you aren’t already in Design Space, please sign in by going to design.cricut.com or click here. Once you sign in you will be taken to your homepage. Please click on “New Project“.

OR
If you are already in Design Space, click the “plus sign” to start.

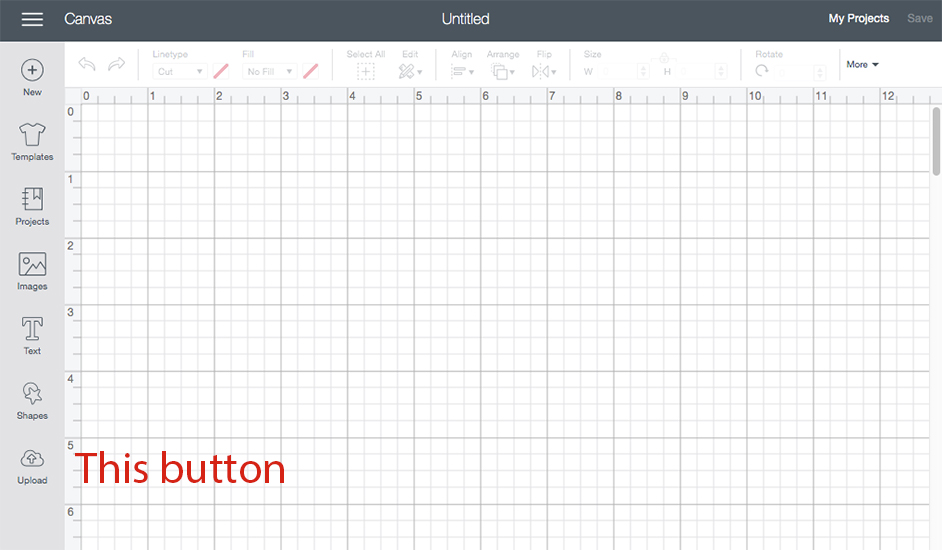
When the canvas opens click on the “upload” button located in the button left hand corner.
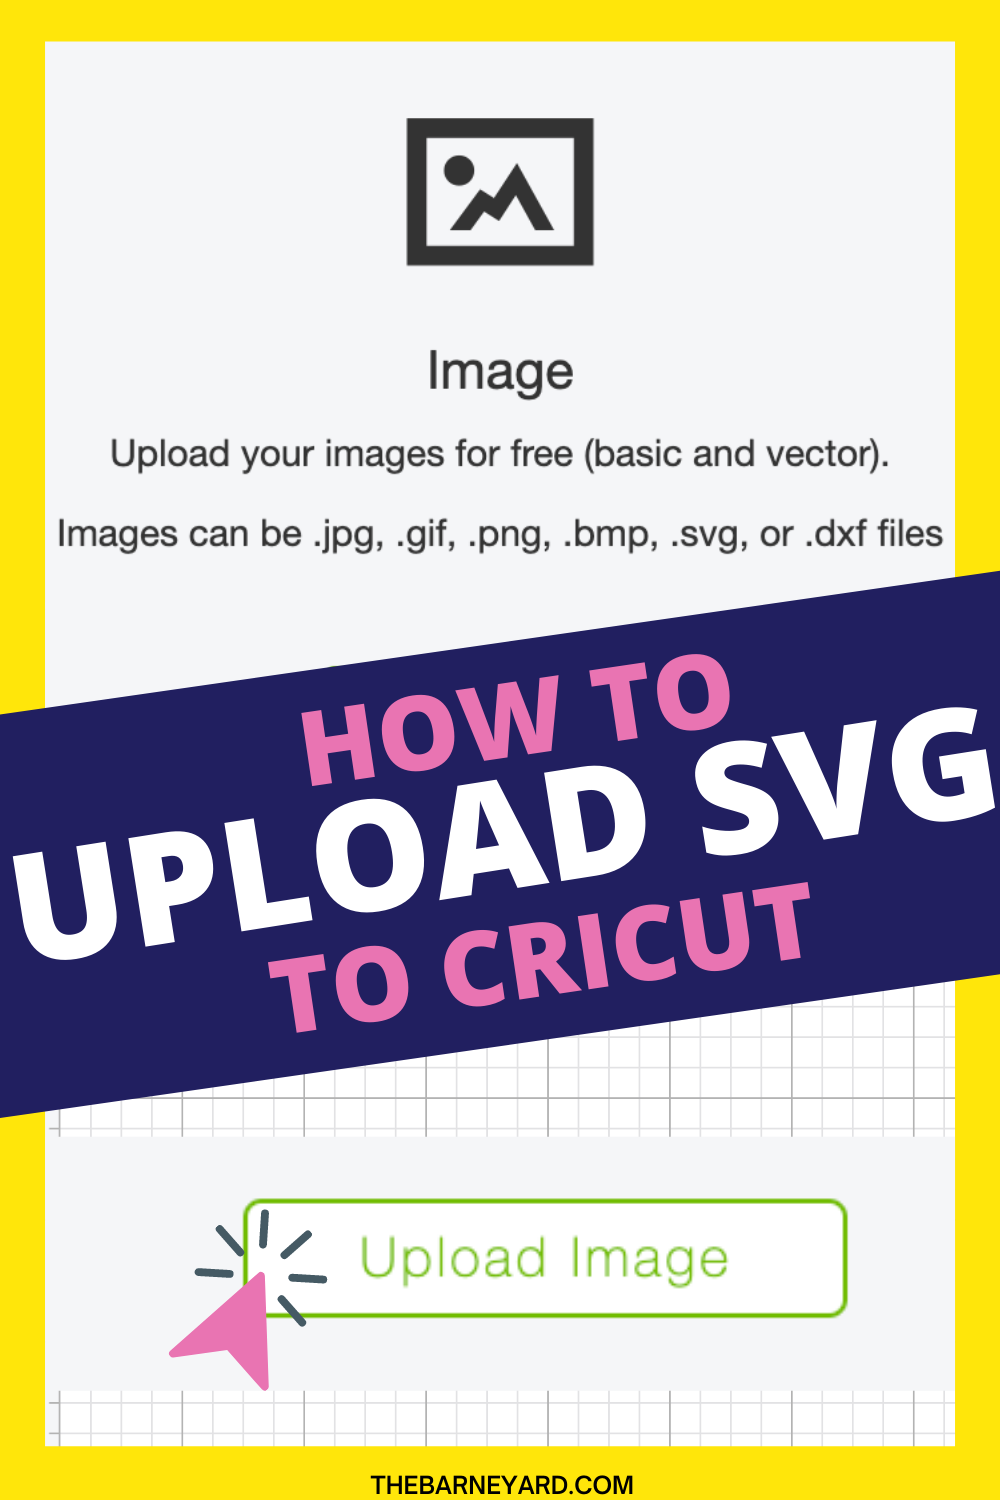
Notice that you can also upload a pattern. If you ever want to upload a pattern, you can follow the same steps as uploading an image. In this tutorial we will be uploading an image to Cricut Design Space so click on “upload image“.

Now click on “Browse”
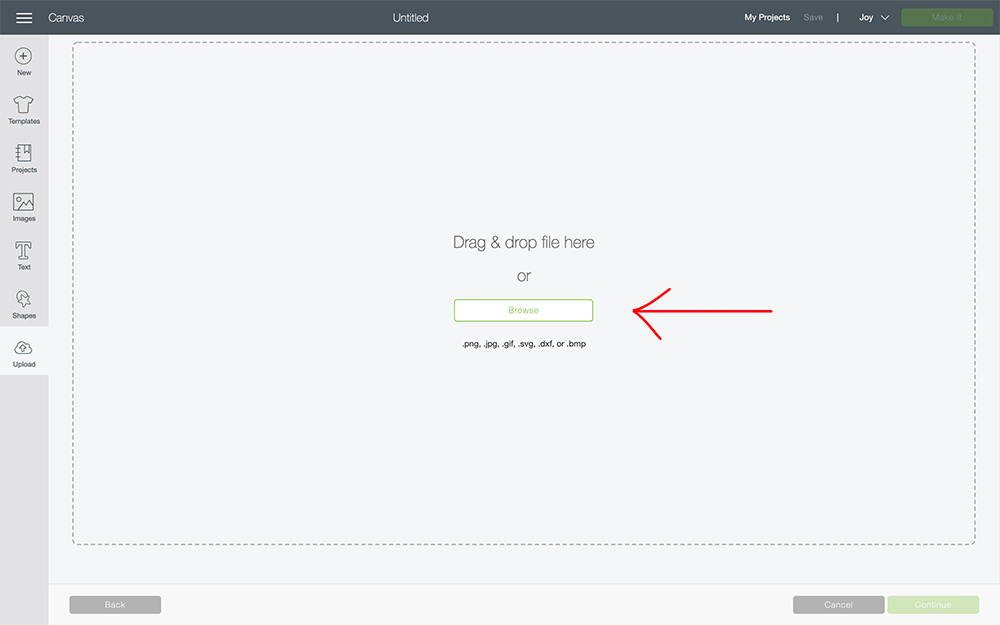
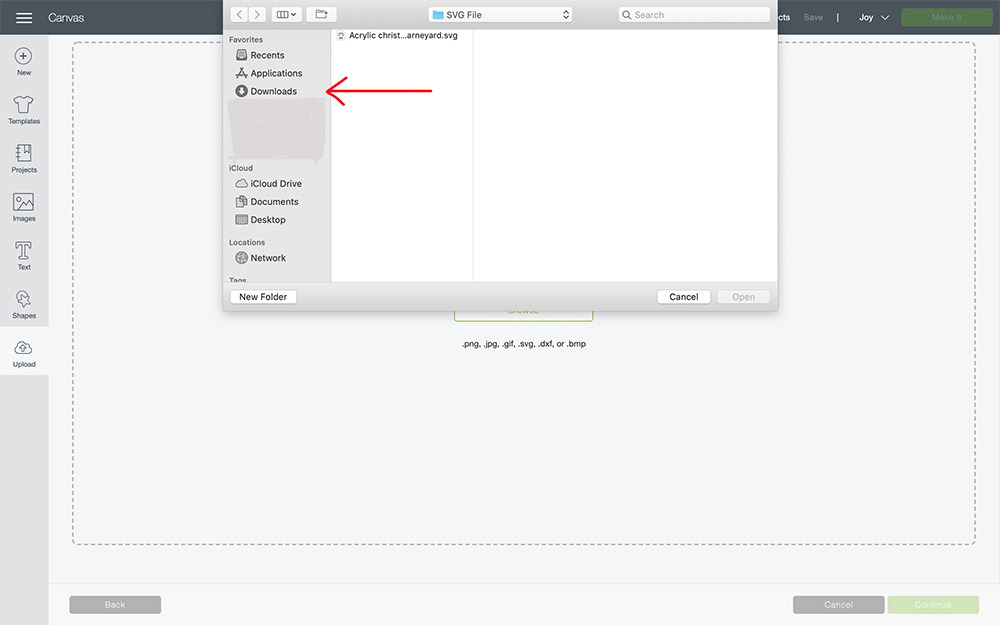
After you select Browse, a new window will pop-up. It is very likely this window will open up in the last folder you were in. Not to worry, we want to navigate to the “Downloads” folder. This is where your SVG will be if you downloaded one from another source. Select the downloads folders and look for the folder with your image. Once you find the folder, click on it and then look for your SVG file in that folder. Select it.
SVGs are usually distributed in a zipped folder. If you don’t know how to unzip a file, check out this tutorial. If you try to select a zipped folder you will get an error message so it is important to unzip the file.
When you select your SVG Image, this window will open and your file will be on a checkered pattern which means the background is transparent. All you have to do now is name and tag your SVG then press “save“. That’s it! Your file is uploaded!
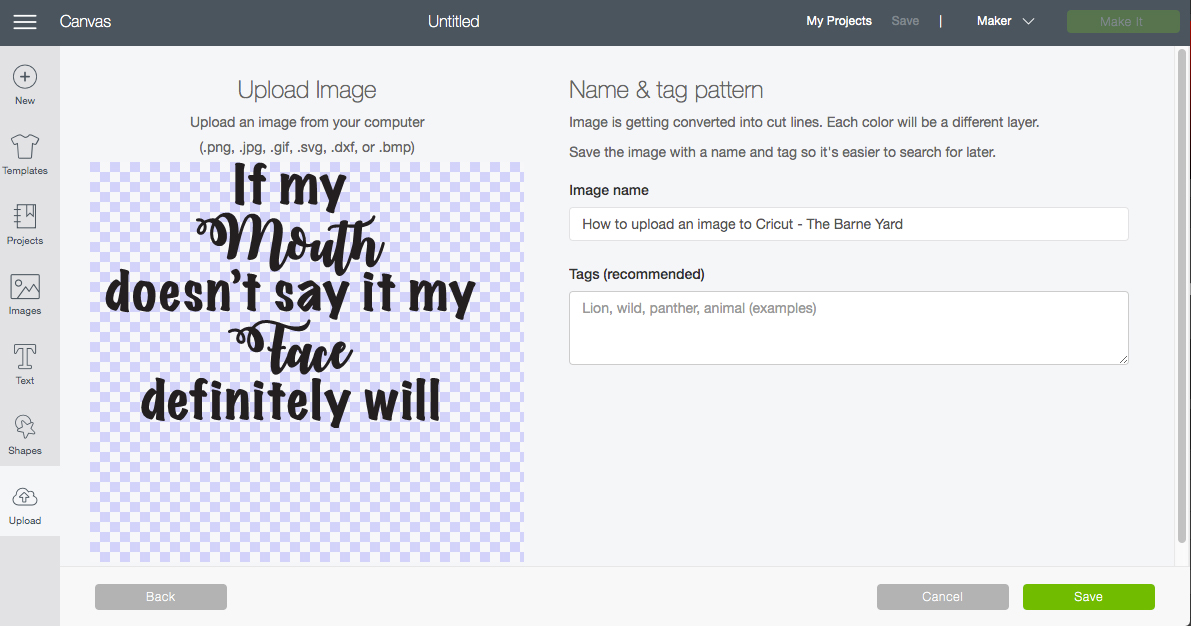
How to erase the background from an uploaded image
If you upload your SVG and you can’t see the entire checkered pattern, you simply have to erase the background which we will go over a little later.
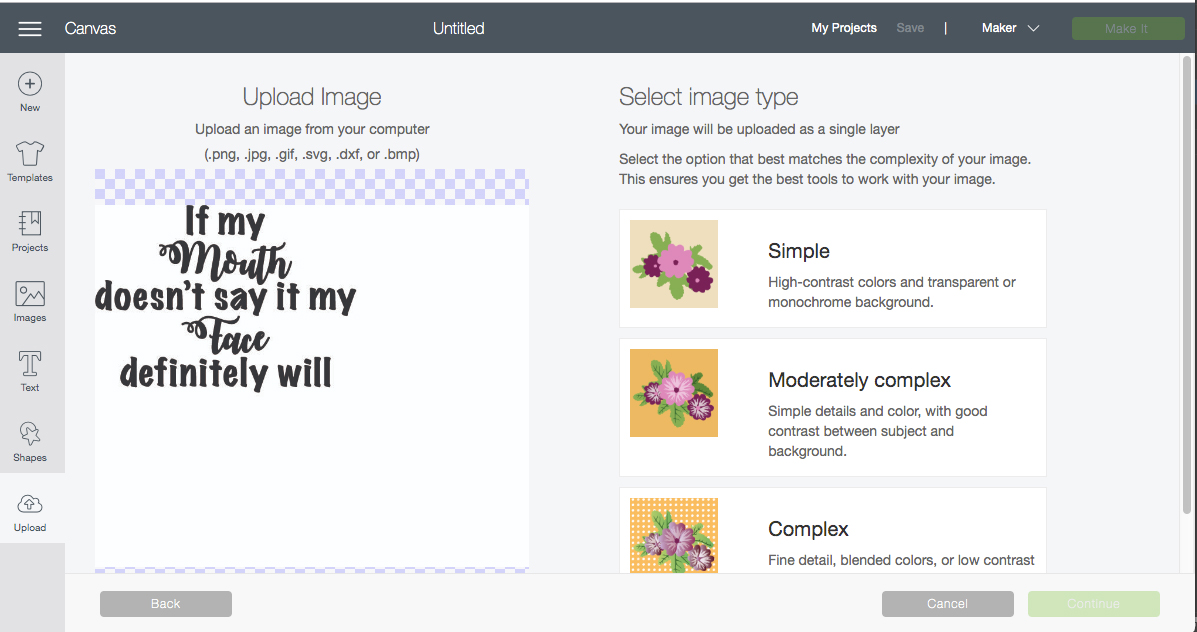
For now, let’s choose one of these options because images that aren’t on a transparent background always open in this window.
If I were to say a particular options always work with certain files that would be a lie. It would be a lie because every image is different and you have to go through each option to see what makes more sense for the image you are working with.
You ultimately want to choose the option that gives you the best cut line so if you click on simple and your cut lines look wonky or faded then select from the other two options. My go-to is complex image.
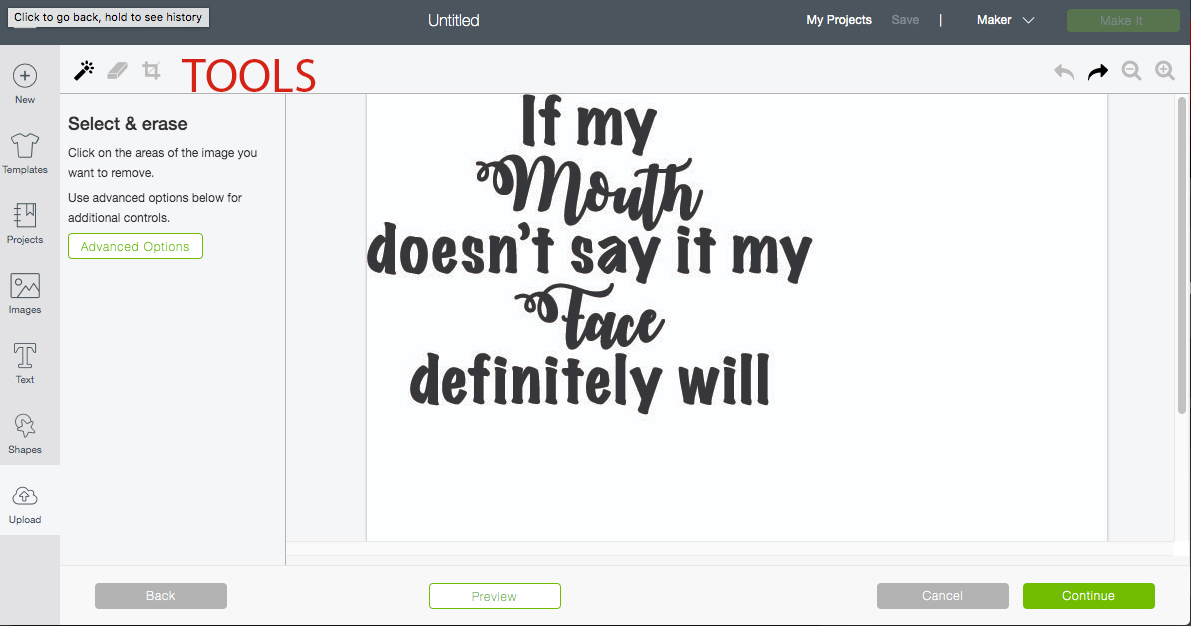
If you want to erase the background of your image, use any of the 3 tools at the top right.
If you erase the background of your image, use the preview tool which is located at the bottom. It’s a great way to see if there are still tiny pieces attached to your image. You want to definitely remove these because your Cricut will read these as cut lines or they will show up on printed projects. Press continue when you’re finished.
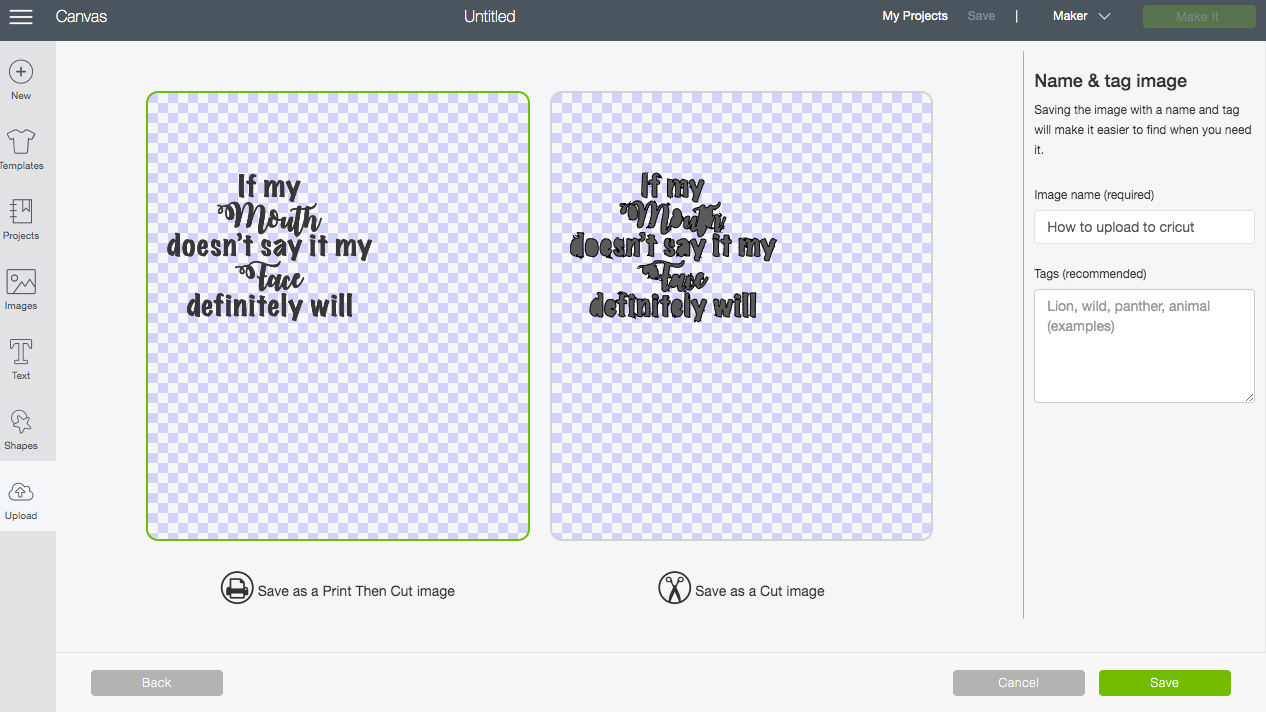
Choose if you want the image to be a print and cut or a cut image. Name, tag and save your image. That’s it! Your image is uploaded!
Tip:
Tag is another way of placing your image in a category. If you tag your image birthday and name it love, it will populate in searches related to birthday even if when you don’t type the actual name of the file.
The image has been save and uploaded, but where do I go to see uploaded images?
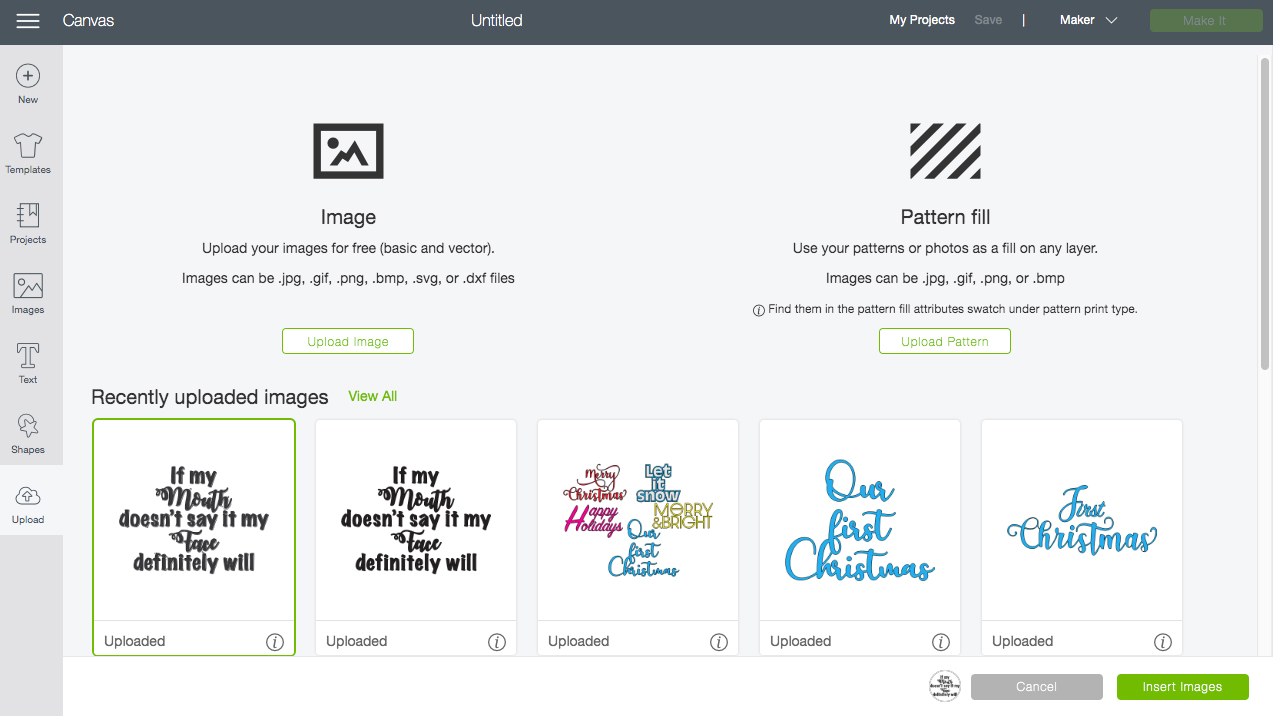
Your uploaded image will appear in a list called “Recently Uploaded Images”. To get there, press the “Upload” button at the button left hand corner of your canvas. You should see all of your uploaded images on the lower bottom half.
If you want to work with one of these images, just select it and press insert. Your image will open on the canvas and now you can work on your design.
Conclusion
There you have it! You have all the tools you need to upload an image to Cricut Design Space. To make this tutorial come alive, I actually created a cute t-shirt for my sister using a free file which is in my Resource Library You can grab your own copy using the sign up form. I made a t-shirt so you can see that the uploading process is not only simple but it actually works. Plus she’s been asking me to make her this shirt for about 2 months now.
That wasn’t so bad right? I’m curious, what has been your biggest struggle when uploading images?
WANT TO REMEMBER HOW TO UPLOAD AN IMAGE TO CRICUT DESIGN SPACE? SAVE THIS PIN TO YOUR PINTEREST BOARD!

Thank you so much. Finally someone explained it so I can understand it since I am technically challenged. I am a senior citizen and I thank you.